3 Comments

Bourbon Balls - Bobby & Peggy Jones

IMAGE.JPG

As I get older, with all the hustle and bustle of what we know and experience as Christmas, I appreciate the memories I have from years past. Just a few days ago, I came across an old comic “The Family Circus” that was shared on a Facebook page. The drawing depicted the mother and father in one room looking into the next where the Christmas tree was displayed. As they watched their four children open their Christmas gifts, their thoughts were depicted below as “They won’t know till they’re grown, but their BEST gifts are the memories they’re making.” This brought a tear to my eye as I think of my parents, as well as family members and friends who are no longer with us to share the Christmas season. Some of the people who have come to mind recently are Bobby and Peggy Jones. 

4DBAFE93-EE87-4182-B367-5CD387D4D998.JPG

photo courtesy of Julie Jones McLeod

Among the friends Mama and Daddy had were Bobby and Peggy Jones. Growing up, I knew Bobby as the Postmaster in Lakeland and Peggy as a nurse at Moody Air Force Base. Their children, Joy, Henry Will, Bob and Julie were close in age to Paula and I and attended First Baptist Church with us. The Jones’ were among the usual cast of characters that came to many a dinner party that Mama threw. In a project I complete several years ago, I compiled movie footage that Daddy shot on a camera and put it to music. Among one of the scenes featured Bobby, Peggy, Joy and Henry Will and showed Peggy making sandwiches. 

Pardon the fuzzy footage taken from the movie. Left to right, top to bottom: Bobby, Peggy, Daddy, Mama

Pardon the fuzzy footage taken from the movie. Left to right, top to bottom: Bobby, Peggy, Daddy, Mama

As I think of Christmas, Christmas parties, and more importantly, food at Christmas parties, many of these featured Bourbon Balls. I was recently reminded of these when a customer at work brought in a batch of brownies made with bourbon. Peggy’s daughter Joy submitted the recipe I will feature here in the Flatlanders Cookbook.  

IMAGE.JPG

For someone like myself who rarely consumes alcoholic beverages, going to the local liquor store can be daunting. I visited Madison Beverage Warehouse in my neighborhood and asked for a good bourbon recommendation. General Manager Brent Higgs suggested the Four Roses special barrel. He explained he and others on staff there visited the distillery and chose that particular barrel as their top choice and an official “Staff Selection”. What I don’t use in this recipe will be used in my Bourbon Milk Punch I serve at Christmas.

Certain recipes, cooking techniques and ingredients don’t stand the test of time like others. For example, this recipe calls for 4x Sugar. To decipher a little, what is intended here is granulated sugar that has been ground four times to more of a powder. As a child I remember Mama buying 4x, 6x and 10x sugar. In preparing for this entry, my local Kroger did not have anything other than regular granulated sugar or 10x confectioners sugar.

IMAGE.JPG

At a local Publix I purchased “superfine” sugar by Domino. I have used this in the past to make lemonade and liked how it offered a quicker dissolve. For the preparation of this recipe, I pulled out my VitaMix that I have owned for almost 20 years (I can count on one hand the times I have used it, including here) . It came with a container to use for dry ingredients as well as for liquid. I ran the Superfine sugar in the VitaMix for 30 to 45 seconds until the sugar was more of a powdery texture but not as much as you would find in 10x. If you don’t own a VitaMix and want to try your blender or food processor, give it a go. Otherwise, use 10x sugar to save some time.

IMAGE.JPG

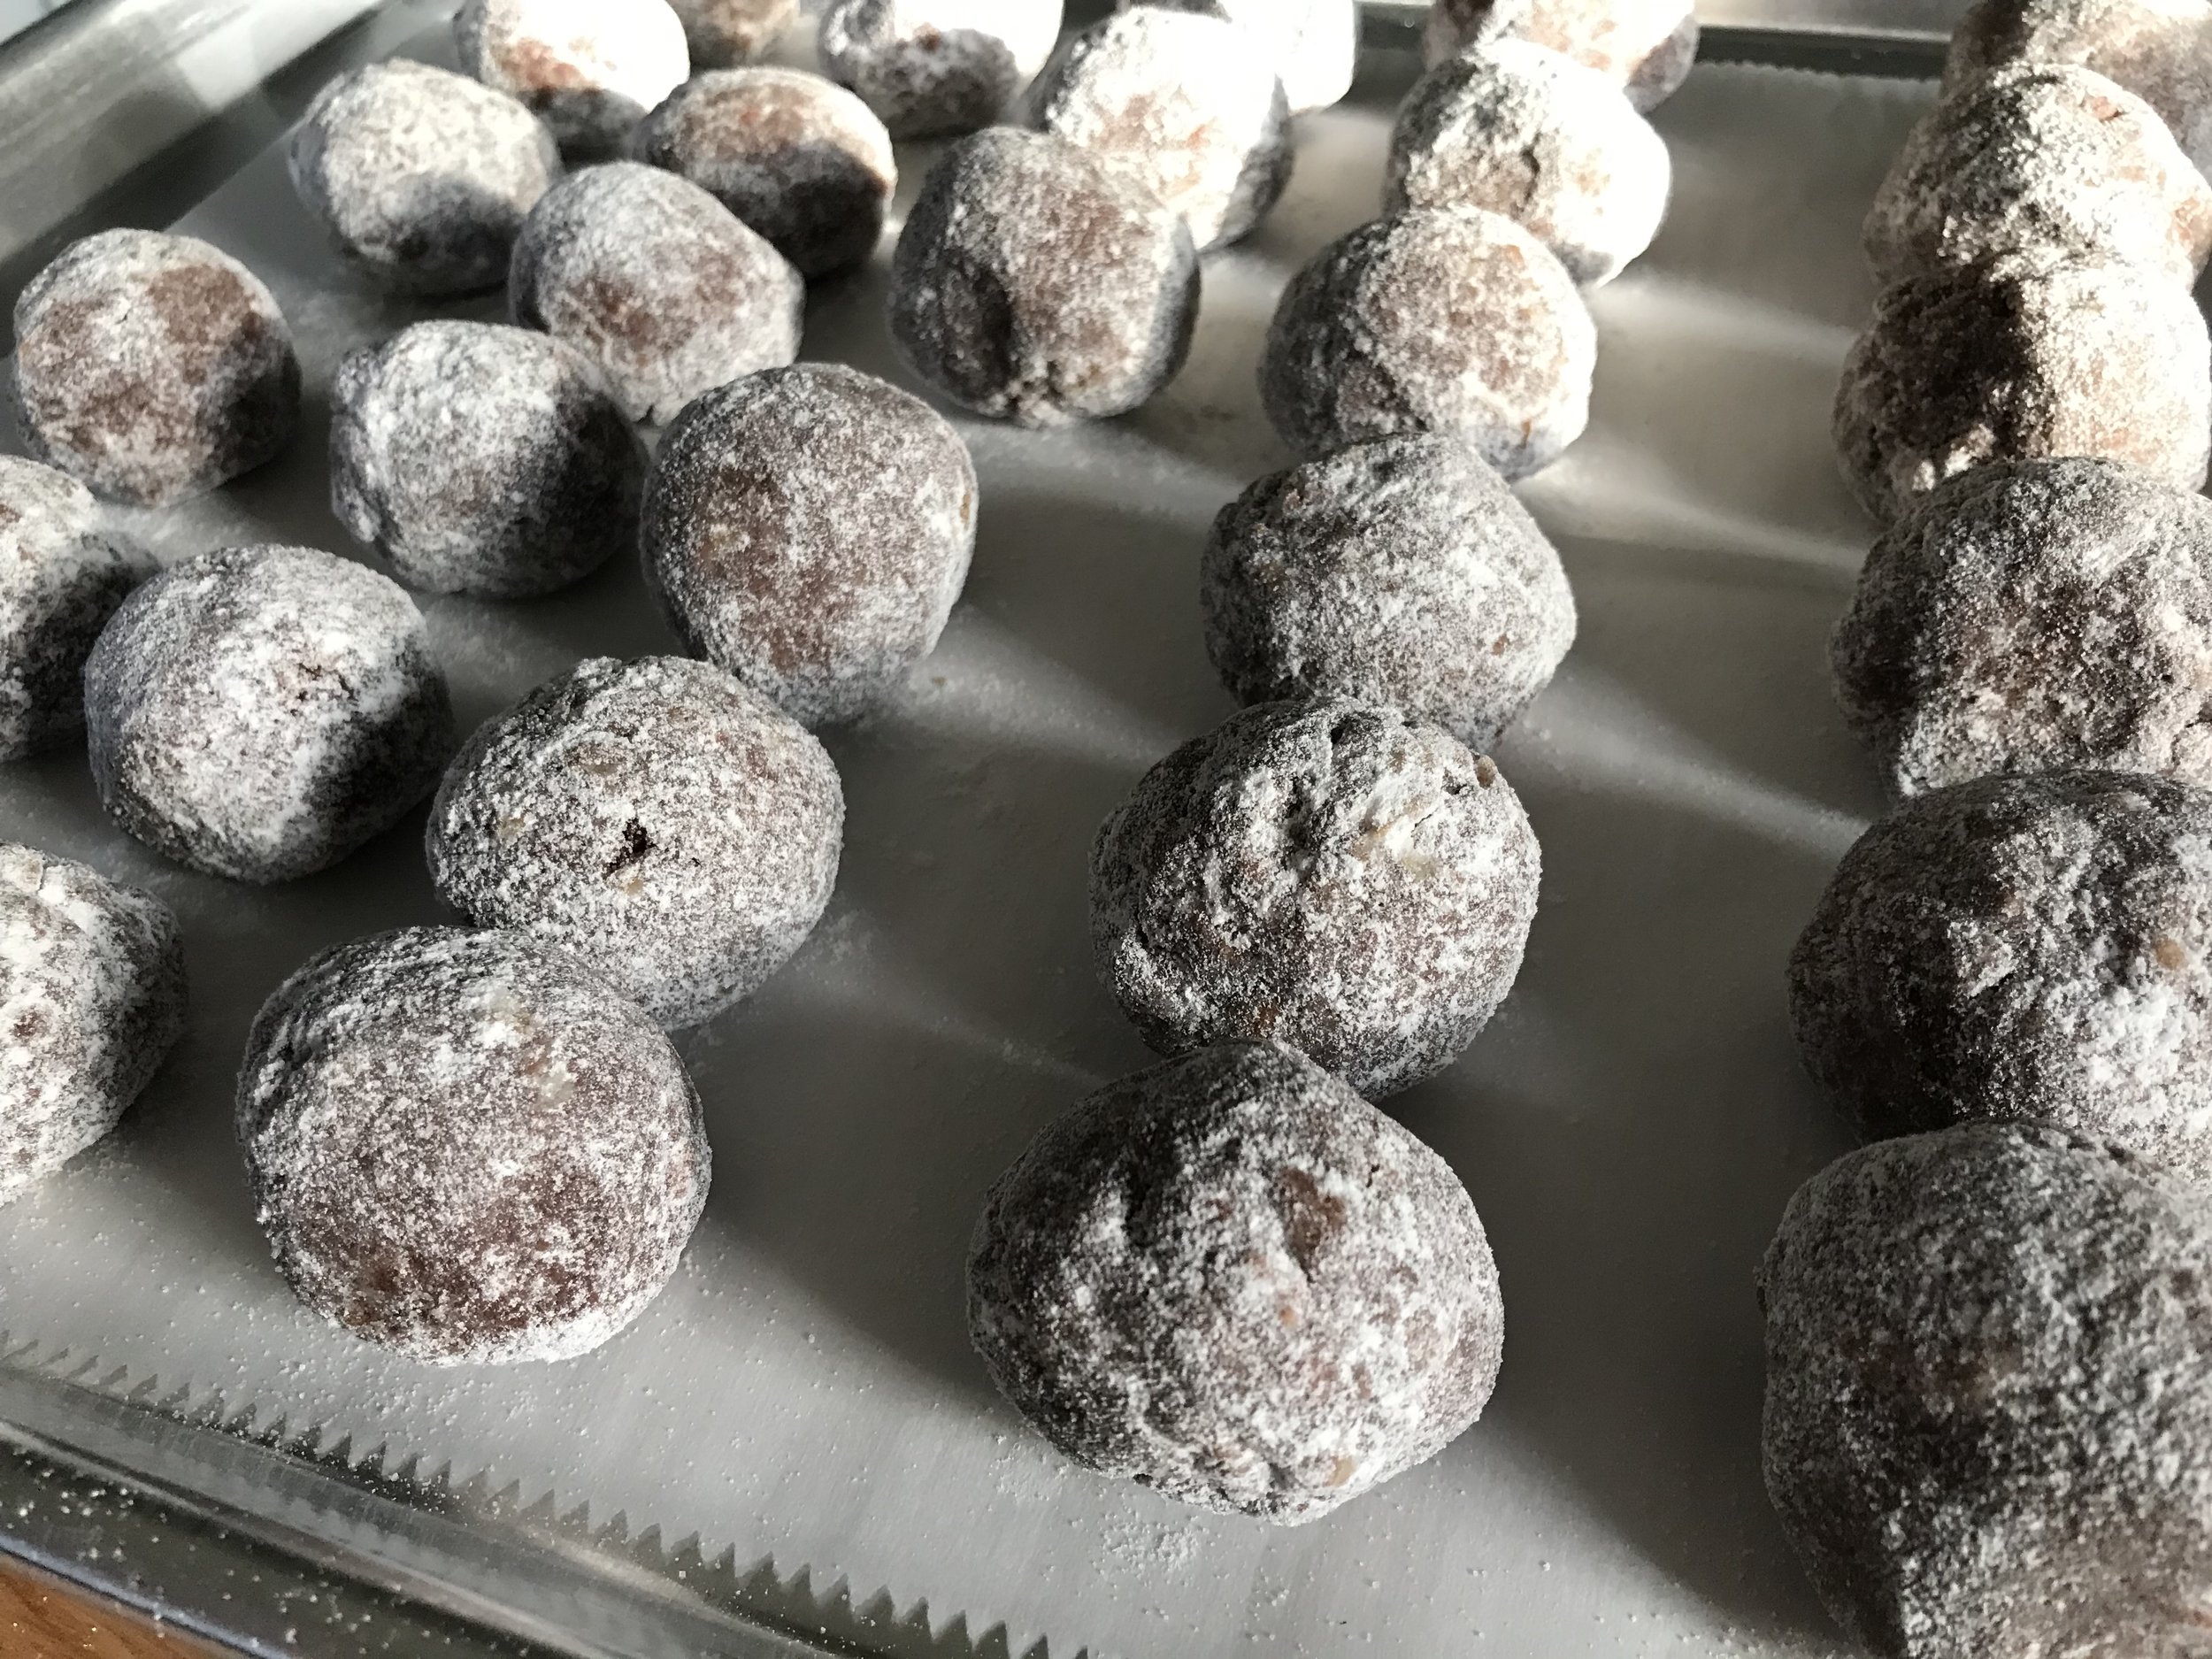
The original recipe stated a yield of 4 1/2 dozen balls. However, my recipe yielded 3 dozen. I used a stainless-steel cookie dough scoop to get a more precise amount for the balls and then rolled slightly in my hand before rolling in the sugar. This is also what I refer to as a make-ahead recipe. These bourbon balls need to “ripen” several days before serving. I would suggest make ahead at least 3-4 days before intending to serve. 

Bourbon Balls  (makes 3 dozen balls)

 1 package (6 oz.) semi-sweet chocolate chips 

1/2 cup sugar 

3 tablespoons light corn syrup 

1/2 cup bourbon 

2 ½ cups vanilla wafers, finely crushed (about 5 cups) 

1 cup walnuts, finely chopped 

powdered sugar, for dusting (see note)

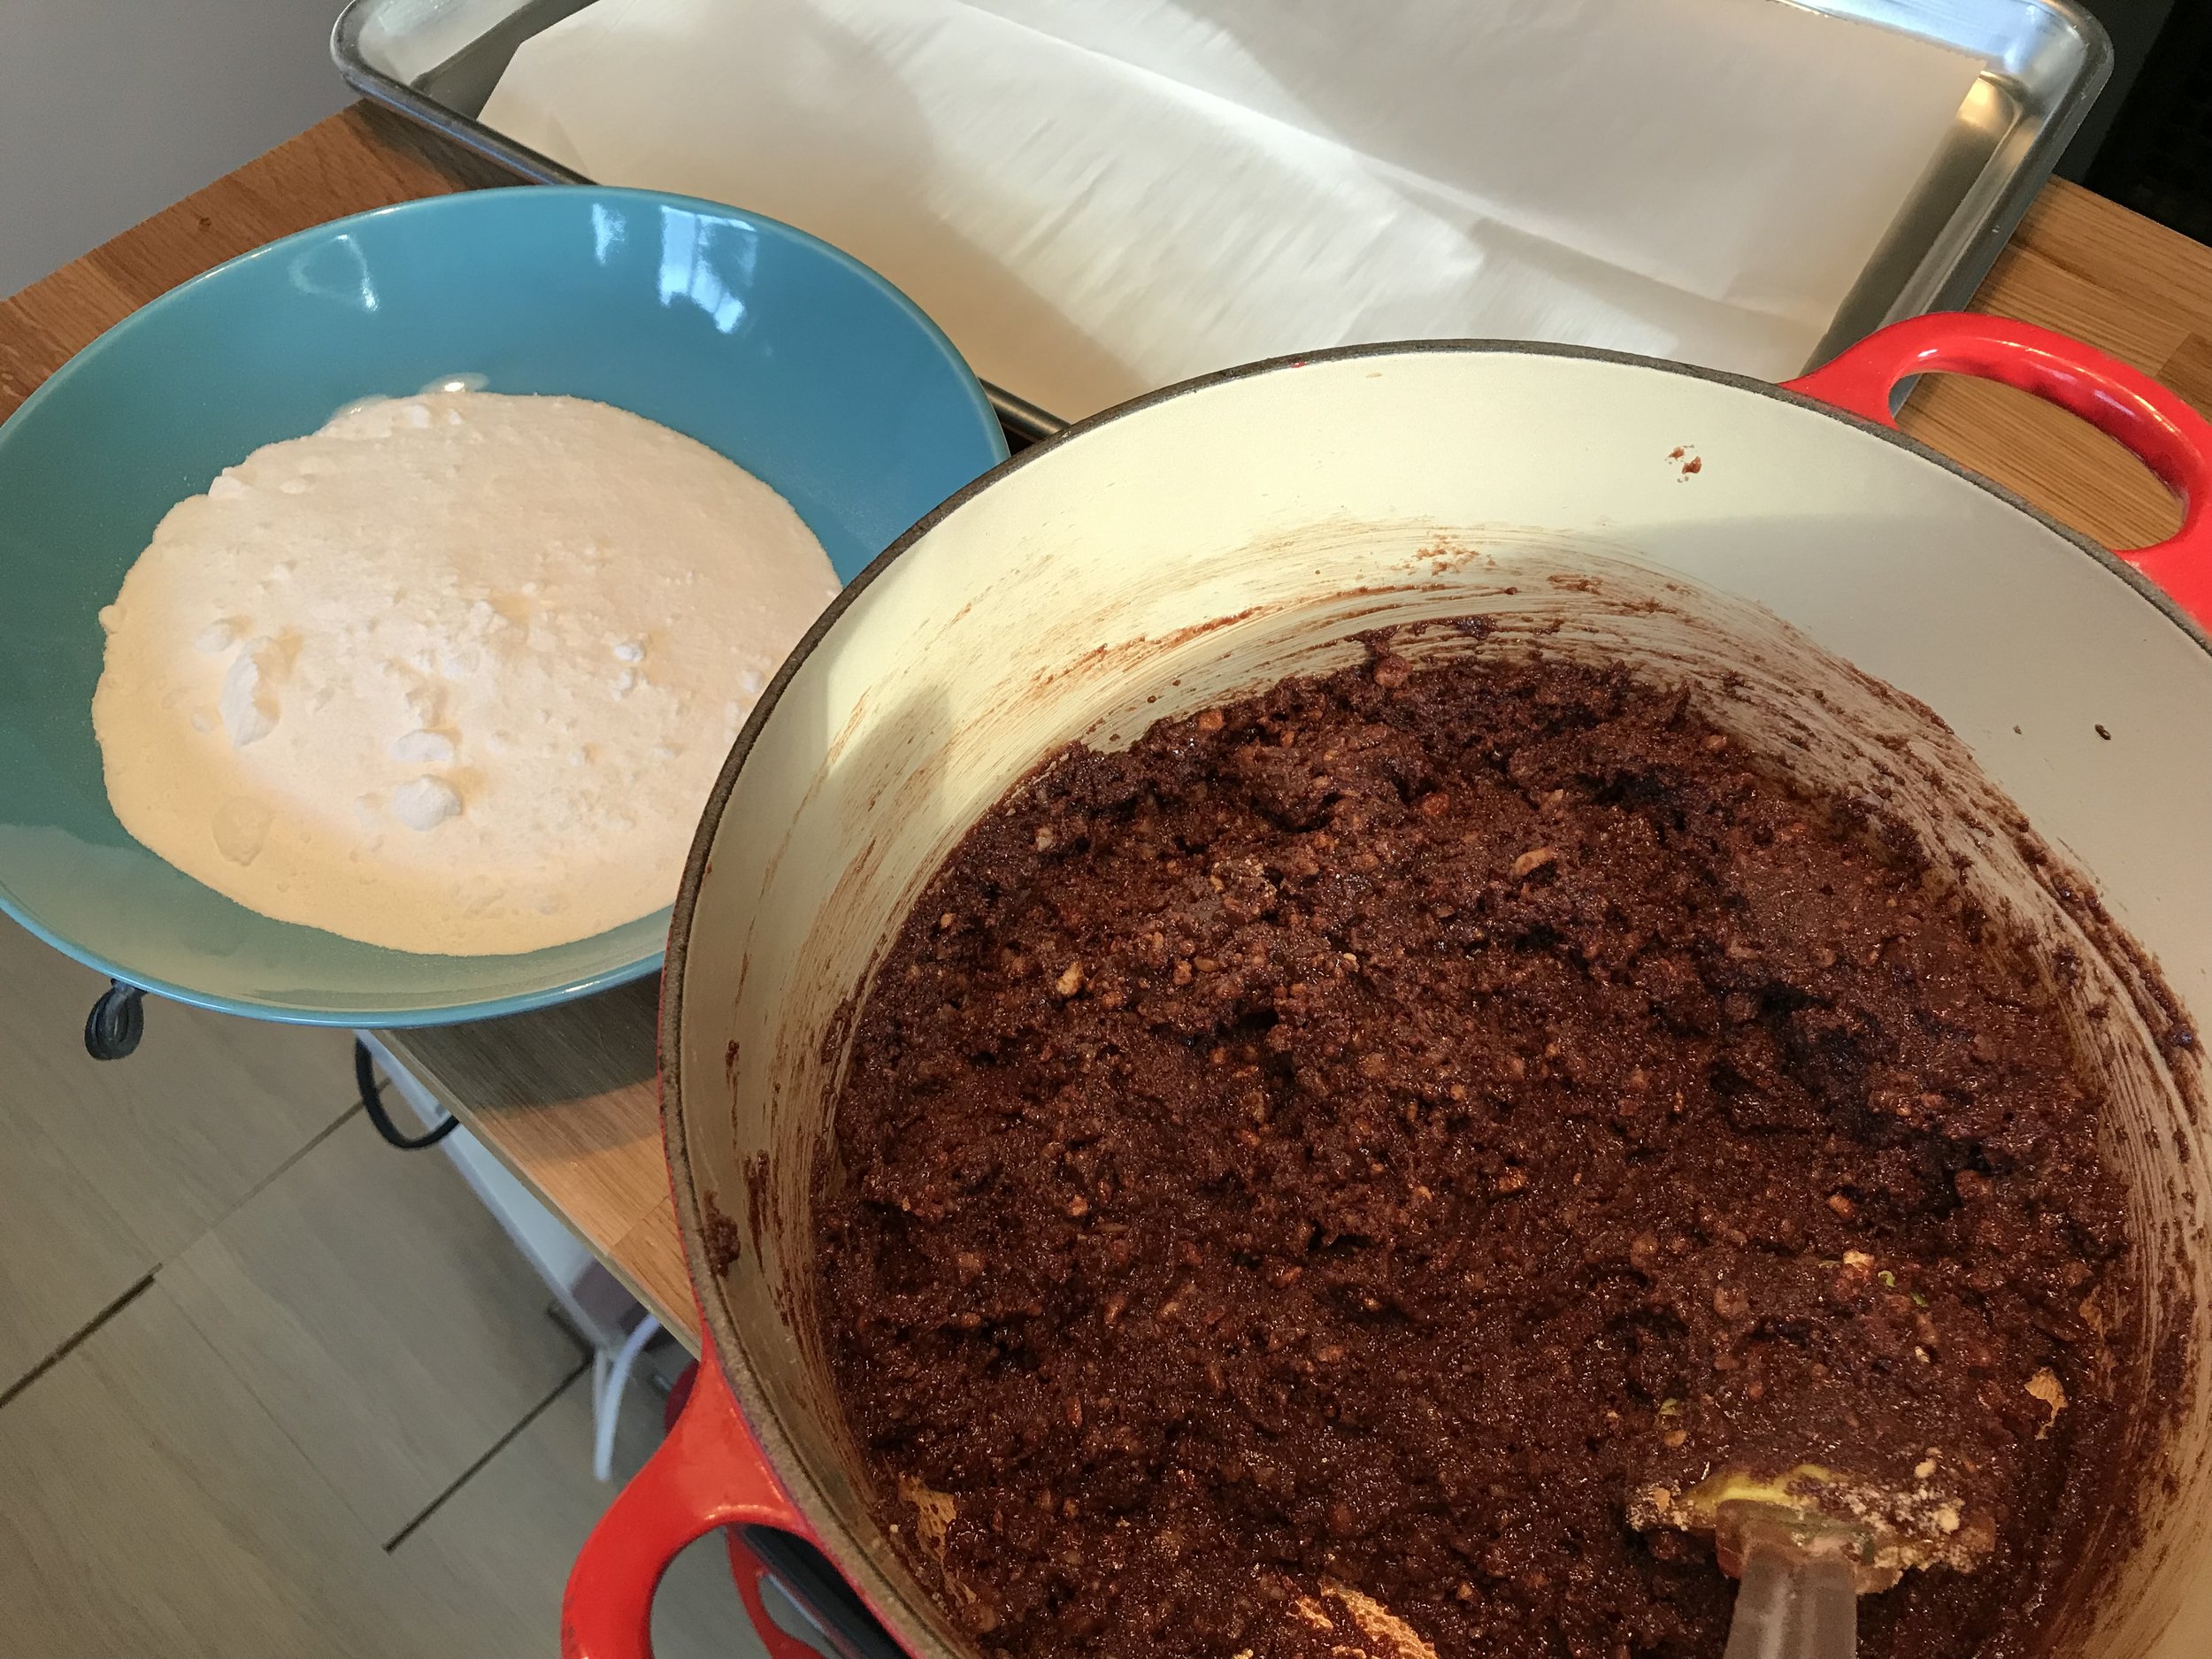
Melt chocolate chips in double boiler over hot, not boiling, water. Remove pan from cooktop and stir in sugar and corn syrup. Blend in bourbon. In a separate bowl, combine crushed vanilla wafers and walnuts and mix well. Add to this your mixture of chocolate, sugar, corn syrup and bourbon and mix well. Form into 1-inch balls and roll in sugar to coat completely. Place in single layers in a covered container; separating each layer using waxed or parchment paper and allow to ripen for several days before serving. 

Note: The original recipe calls for 4x confectioners or powdered sugar. I was not able to locate 4x confectioners sugar as 10x is what is currently available. I used Superfine sugar, which is designed for beverages or anything that you desire a quicker dissolve, and processed it for 30-45 seconds to yield a more powdery texture but not as powdery as 10x.  

3 Comments

1 Comment

Cookbooks...

Where my collection sits...

Where my collection sits...

Cookbooks...everyday cooks love them and those who don't know how to turn their oven on love them. I like different cookbooks best for different reasons. I classify cookbooks into categories and qualify my favorite in each. 

3 of the best!

3 of the best!

A go-to cookbook would constitute a volume that likely has any recipe you could hope to make at any given time. This is when I want to pick up just one book and find exactly what I am looking for. Whether it is a book that originates from a small town in South Georgia or one that is an exhaustive one titled How to Cook Everything, there is probably one of these in your collection. 

Have you ever taken a trip that afforded you an opportunity for an unusual or different dining experience? I would classify cookbooks like these as travel or excursion titles. Many cookbook titles are available that are written by a chef of a famous restaurant or have an affiliation with a landmark or unique place that was visited. 

Some of my favorite cookbook titles are those that I would define as regional. They features recipes of a particular town, city, county, or state. I would also put into this category cookbooks published by groups from churches and community groups. Often these are used for fundraising or giving back to the community in one way or another.  

Classic cookbook titles, for some, might constitute a book that has stood the test of time and sold many copies over a span of several years. For others, it could be a title that was initially published ten or more years ago. Some of these might include a recipe written in paragraph form where the reader is required to read the entire recipe to determine ingredients and instructions (as they are not clearly given), or one where the writer gives necessary information in the chapter that features the given recipe and not in the recipe itself. 

The last category that I classify for cookbooks are those of an instructional nature. Besides recipes, does the writer offer the reader a way to learn new skills, tips or other helpful information besides a recipe and a photograph? In a similar way, a cookbook that offers the reader stories of the people and places that have impacted the recipes offered in the collection.

My go-to cookbook for many years has been Flatlanders Cook Book A Collection of Recipes from Lanier County, Georgia compiled and edited by lifelong family friend and community leader Helen Strickland. My copy is the third edition that was printed in 1980 and many of the dishes found there were staples of my childhood. It’s also a great example of a regional cookbook where cooks from the county were summoned to submit their favorite recipes. The only cornbread dressing recipe I will make and eat is found here, as well as neighbor Libby Shaw’s Sour Cream Pound Cake. 

Mama’s favorite cookbook would fall into the classic category. Southern Cooking by Mrs. S.R. Dull. It was published the same year she was born, 1928; with additional recipes added for a 1941 edition. Henrietta Stanley Dell was the longtime editor of the home economics page of the Atlanta Journal. She organized the first departments of home economics in Georgia schools and colleges, and conducted cooking schools throughout the South. My maternal grandmother, Clyde Patten, attended one of her events in Atlanta in the 1940’s. This cookbook is very different than what you would find today. There are no photographs of any of the recipes prepared, and, as was with the time of the first edition, ovens were not controlled with a thermostat. She often gave instruction for the item to be placed in a “slow”, “medium” or “hot. If you add this to your collection, and I highly recommend you do, please make sure you read the opening chapter where the recipe is located, as she often gives instructions that will not be found in the recipe itself. 

I do not have any cookbook titles in my collection currently that were purchased because of travel or from an excursion. However, my copy of Morton’s The Cookbook; 100 Steakhouse Recipes for Every Kitchen by Kraus Fritsch with Tylor Field III and Mary Goodbody allows me to recreate recipes from one of my favorite restaurants in my kitchen. I love their blue cheese dressing and the rub they use for their ribeye prepared cajun style. 

If you are looking for something of the instructional nature, I would recommend Keys to Good Cooking; A Guide to Making the Best Foods and Recipes by Harold McGee. He writes about the science of food and cooking and has been named food writer of the year by Bon Appétit magazine. It is very easy to read and is divided into chapters like any cookbook you would find. 

Instead of links, I plan to make patties and smoke them in my new smoker!

Instead of links, I plan to make patties and smoke them in my new smoker!

Deep Run Roots: Stories and Recipes from My Corner of the South by Vivian Howard is the kind of cookbook I hope to one day publish. In her over 500 page volume, she tells stories of her childhood in Eastern North Carolina and shares many of the recipes she grew up on. It’s a beautifully photographed storybook as much as it is a cookbook. I plan to use her recipe for fresh sausage for my annual Christmas morning breakfast. 

I would love to know what you would consider your favorite cookbook. In the comments below, please list the name of your favorite cookbook and share why you love it. With the advent of the internet and plethora of cooking shows/videos at our disposal, I find there is nothing that beats reading and looking at a cookbook. 

1 Comment

Thanksgiving Leftovers - Sausage Balls - Christine and Frank Strickland

Comment

Thanksgiving Leftovers - Sausage Balls - Christine and Frank Strickland

Thanksgiving has come and gone and now it’s everything Christmas. Is your refrigerator full of turkey and pans of green bean casserole? Over the last several years, I have decided that I would eat or give away as many leftovers as possible. Otherwise, it is like throwing money out with the garbage. But let’s be realistic; turkey sandwiches for a week is one thing. However, leftover dressing (mind you I did not say stuffing) I don’t enjoy eating when it is reheated.

I have pondered ideas of what to do with leftover dressing for the last few years. An idea that kept floating back and forth in my mind was a sausage ball that used dressing instead of baking mix. As a child growing up, our family spent many a Christmas Eve evening at the home of Frank and Christine Strickland, lifelong friends of my family. Every year Sausage Balls appeared on the table of delicious hors d’oeuvres that Christine prepared.

Christine Strickland  

Christine Strickland  

Frank Strickland

Frank Strickland

To give you a little background on the Strickland’s, Christine was an educator in the Lanier County School System for 30 years, and also served on the South Georgia Regional Library Board. Frank was a lifelong advocate of Georgia’s tobacco industry and an active Georgia Farm Bureau member. Strickland served on numerous tobacco organizations and served as Georgia Farm Bureau 1st vice president from 1984 to 1992. Prior to 1984, he served as GFB 3rd vice president for four years and served as a state director for 15 years. He also served on the Flue-Cured Tobacco Cooperative Stabilization Corporation’s Board for 20 years representing all the flue-cured tobacco producing counties in Georgia and Alabama. 

This year as I saw two large containers of dressing in my refrigerator, I decided it was time to try my idea. I used Christine’s recipe for Sausage Balls and instead of baking mix I used the leftover dressing. I mixed all ingredient well with my hands and used my cookie scoop to make perfect sized balls. After baking them and tasting, I loved the flavor but felt this would make an unsuitable appetizer as the balls were not firm enough to stay together as a finger food.  

IMAGE.JPG

Determined to find a better use for this leftover dressing, I decided to put my mixture in my meatloaf pan. After baking for 40 minutes at 400ˆ, the result was satisfying in taste and in the experience of eating it. As I ate the slice(two, actually), i liked the cornbread texture and I didn’t feel one ingredient overpowered the other. I would be curious to know it would taste if I had doubled the sausage in this recipe. I would imagine it would taste more like an actual meatloaf.


IMAGE.JPG

Sausage Balls make a great appetizer and they are great to make ahead and freeze. Christine’s recipe titled “Sausage Cheese Bits” appeared in Flatlanders Cook Book: A Collection of Recipes from Lanier County, Georgia.However, I never remember this recipe being called anything other than Sausage Balls. This was my mom’s go-to recipe and it is mine as well.

Sausage Balls


10 ounces sharp cheddar cheese, grated

3 cups Bisquick baking mix

1 pound fresh breakfast sausage, hot


Mix Sausage, cheese, and biscuit mix thoroughly. Form into small balls. Place on ungreased cookie sheet and bake at 400° for 12 to 15 minutes or until done

Comment

2 Comments

Ham Bone Dumplings

image.jpg

Lately I have not been inspired to cook. The recent Easter holiday did not offer any hope for my kitchen to be occupied. In the March edition of Bon Appetit magazine, a story featured writer Andrew Knowlton who worked 3 - 8-hour shifts as a cook at a Waffle House in Atlanta. This inspired my dining adventure for the day. I had no idea my Scattered and Covered Hashbrowns would be as good as they were when topped with Country Gravy!

Meal Planning for the week following Easter, I purchased a spiral sliced ham from my local Publix for the purpose of sandwich making. I knew the leftover ham bone would be perfect for a soup or pot of beans, but I was looking for something different to make. 

Don't hate me because I don't make my own dumplings

Don't hate me because I don't make my own dumplings

One of the most iconic dishes of the South are Chicken and Dumplings. Mama used to make her dumplings by hand until she found a product called Mary Hill Dumplings at her local grocery store. From that point on, she never rolled another dumpling by hand again.  Luckily, I can find these at my local Publix or WalMart stores and therefore I never plan to make dumplings from scratch. 

I seem to recall Mama making Ham and Dumplings at one point in time. The recipe I used was found on Mary Foreman's site "Deep South Dish". To clarify, for testing purposes, I used frozen, flat dumplings and did not test the recipe for dumplings that is listed here. Her recipe uses what is called a "dropped" dumpling, whereby the mixture is dropped by spoonfuls in the boiling pot of stock, as opposed to dropping the flat dumpling into the pot. 

Ham Bone Dumplings

recipe courtesy of Mary Foreman  www.deepsouthdish.com 

Makes about 4 to 6 servings

For the Ham Stock:

1 large meaty hambone

3 quarts of water

2 whole celery stalks (ribs) with leaves, rinsed and cut into large chunks

2 large carrots, unpeeled, rinsed and cut into large chunks

1 large onion, unpeeled and quartered

4 sprigs of fresh parsley

2 bay leaves

1/2 teaspoon of whole peppercorns

For the Dumplings:

3 tablespoons of vegetable shortening

1-1/2 cups of self-rising flour

1/2 cup buttermilk or milk

1/4 cup of reserved ham stock

Salt, only if needed, to taste

Place ham bone in a large stockpot, along with the remaining stock ingredients. Bring to a boil, reduce heat and simmer, uncovered, for 2 hours or until mixture is reduced to about 1-1/2 quarts. Strain, reserving the bone and stock; discard vegetables. Once cooled, pick off any meat from the bone, reserving the meat and discarding the bone. Refrigerating the stock overnight is best when possible.

When ready to prepare dumplings, set aside 1/4 cup of the stock. Mix together the dumpling ingredients until they form a soft dough. Bring ham stock to a rolling boil. Using a small spoon, scoop out and drop into boiling broth and cover immediately so that the dumplings begin to steam; simmer on low about 10 minutes before checking. Don't overcook or dumplings will be dense and hard. Taste broth and adjust seasonings if needed, adding freshly cracked black pepper. Carefully scoop broth and a few dumplings into individual serving bowls.

Cook's Notes: May substitute 2 or 3 meaty ham hocks. If the bone or hocks you use are not very meaty, add in about 1 to 1-1/2 cups of chopped, smoked ham.

2 Comments

3 Comments

Snow days are cooking days

A view of East Meade Avenue and Madison Park, Madison, Tennesse

A view of East Meade Avenue and Madison Park, Madison, Tennesse

The Winter of 2015 is the 14th one I've spent in the Nashville area. Some winters have been worse than others. My car sat stuck in ice on Briley Parkway for three days during the winter of 2003. Had that been my first winter here I would have made an exodus for South Georgia. Not having much experience driving in icy roads, each Winter comes with much anxiousness rather than anything I would look forward to. I don't own any snow toys, sleds or other winter-fun paraphernalia. I missed my chance this past Sunday morning at my local Lowe's store as they were putting out such things. I can guarantee you I will have a sled ready for a future snow day!

I think this was in 1973, Lakeland, Georgia

I think this was in 1973, Lakeland, Georgia

I remember one snow day in South Georgia growing up; I think it was 1973. I'd be curious to know if Western Auto or Miller Hardware in Lakeland had any sleds in stock that day. 

With local news media outlets using scare tactics to keep people indoors during days like this, I usually follow suit and retreat to the kitchen. I made a couple of excursions out to buy food to my local Aldi food store across the street and endured an almost 1.5 mile round trip to my local Kroger. The term "cabin fever" always applies to me as I'm not used to spending much time at home. Surviving a few near slips on black ice, I survived and arrived home safely from each trip. 

On the menu over my two-day home stay were bacon and eggs, Tomato French Onion Soup and a recipe I found on Facebook called "Crazy Good Casserole".  A serving of this dish will allow me to stay indoors today during a lunch break rather than endure a stroll to my local Chipolte in 16º weather! 

Crazy Good Casserole

4-5 boneless, skinless chicken breasts, cut into bite-sized chunks
6 strips of quality bacon
2 cans cream of chicken soup
2 cups shredded Monterrey Jack cheese
1 box (16 ounces) dried spiral pasta (I used penne pasta)
1 tablespoon garlic powder
salt and pepper to taste

Preheat oven to 400°F.  Pan-fry bacon according to package directions until crispy; place on paper towel to drain. When cool to touch, crumble bacon and set aside.  Cook chicken in pan where bacon was cooked. Add garlic powder and salt and pepper to taste. While chicken is cooking prepare pasta according to directions. Spray a 9 x 13 pan with non-stick cooking spray. Drain pasta and return to pot. Add chicken, cream of chicken soup, 1 cup of Monterrey Jack cheese. Stir to mix well; using hands if necessary. Pour into prepared baking pan. and top with crumbled bacon and remaining Monterrey Jack cheese. Bake for 20 minutes, just until cheese is melted and beginning to brown on top. Makes 8 servings.


3 Comments

1 Comment

Pork Neckbones & Rice

Not a pretty dish for certain!

Not a pretty dish for certain!

I was shopping at my local Kroger this past Saturday when out of the corner of my eye I saw "fresh pork necklines". It has been a couple of years since I have prepared them with rice. Mama on occasion would make these and I often remember these being served at family reunions or church potluck dinners. It is a little on the greasy side as compared to chicken and rice. Also, as you eat and enjoy this you will come across some soft bones. Discard these in a proper, lady or gentleman-like fashion!

2 - 2½ pounds fresh pork neckbones 
½ cup cooking oil
1 tablespoon  garlic powder
2 tsp salt
1 tsp black pepper
1 onion, sliced
4 green onions, chopped
6 cups of water
2 cups rice

Using a large pot or dutch oven, brown neckbones in cooking oil over medium-high heat, turning them frequently; about 5 to 7 minutes. Add the chopped green onions, the sliced onion and garlic powder, salt and pepper. Add water and bring to boil. Cover pot with tight-fitting lid and simmer on low for 1½ hours, stirring once or twice.  Add rice, skimming fat if desired with a slotted spoon.  Simmer 15 minutes, stirring once. Turn off and move to other side of cooktop. Let sit 15 to 20 minutes with the top covered before serving. 

1 Comment

1 Comment

Everything old is new again

First, I would like to apologize to all of my followers and readers for not providing you with recipes and stories to compliment the Christmas season. Two jobs and household projects interfered with my writing and cooking opportunities. 

Last week, I was talking with one of my customers named Nancy, as she was relaying a story of emptying the contents of her Florida condominium. I then began to tell her how my 13th anniversary of moving to Nashville would occur on December 26 and how I was still holding on to a few items I could not bear to part with. 

Growing up, Mama had what I would call a utility table. I don't know the origin of it as I believe it was made rather than purchased. It has a white, formica-type of top with a wood bottom painted black and it's legs are of metal. She kept this table in what she called 'the Rosie room"; an garage that had been enclosed where many tasks centric to our household occurred. The laundry room was a separate space within the Rosie room. In addition to laundry, she used the Rosie room to sew, quilt, and put up vegetables, This table was an important piece of almost every task that occurred in the Rosie room. Many times I remember her sitting down at this table to fold clothes. 

Upon leaving Lakeland, this table is one of the items I wanted to keep. I did not have enough extra space in my apartment or in my home to use it so It has either been in storage or in my shed behind my house for the last 13 years. 

My home is under 1000 square feet and does not lend itself to being big enough to throw huge dinner parties. A number of years ago, I purchased an inexpensive dining room set and rarely use it for dining purposes. It has recently showed signs of scratching to the point that one would be able to see it is not of high quality. My conversation with Nancy helped me decide that the table from the Rosie room would take its place.

Left to right, Callie Mae & Banjo

Left to right, Callie Mae & Banjo

This morning I pulled the utility table out of the shed and cleaned it thoroughly. I brought it inside and placed it where an inexpensive dining room table was taking space. I covered it with a tablecloth and Voila!  However, it seems my cats Banjo & Callie Mae have decided to use it for their purposes.

Cats 1...Lawson 0

Cats 1...Lawson 0

So...it looks like this table is the new playground for the cats. I could not even get this blog post written before this happened. 

1 Comment

2 Comments

Pea & Asparagus Casserole

Living in Macon, Georgia during the 1990's, I occasionally had the opportunity to dine at the New Perry Hotel in nearby Perry. This dish was one of my favorites and luckily, the recipe was available in a cookbook they sold at the hotel. This dish is comfort food with a capital "C" and has become a staple for my Thanksgiving menu. 


2 cups LeSeur peas

2 cups asparagus tips, drained

1 T. salt

1 jar diced pimentos, drained

dash of paprika

2 hard boiled eggs, sliced

1 ½ C. crushed Ritz crackers

1 C. milk

½ cup melted butter


Mix all ingredients except for egg slices and butter.  Pour into buttered casserole dish and pour butter over the top.  Place egg slices on top and bake uncovered for 20-30 minutes at 350° F.

2 Comments

2 Comments

Mama's Dressing - Yes, I said Dressing, not Stuffing

Growing up in South Georgia, not many people I knew talked about eating Stuffing on Thanksgiving. The only term I was familiar with was Dressing. Mama would make Dressing on occasions other than Thanksgiving. I never recall her actually stuffing the turkey with a cornbread mixture; it was prepared separately. 

This recipe was featured in my hometown cookbook Flatlanders Cook Book as Ritz Cracker Dressing. The biggest difference about this recipe is that it does not contain sage or poultry seasoning. My opinion is that the least amount of either can be overpowering. Add it if you wish; but it will not be like Mama made it. 

Mama's Dressing a.k.a. Ritz Cracker Dressing

6 cups chicken broth

2 cubes chicken bouillon

1 cup celery, finely chopped

1 cup onion, finely chopped

3 cups crumbled corn bread

4 sleeves Ritz Crackers, crumbled

3 boiled eggs, chopped

4 eggs, beaten

1 stick butter, cut into pieces

Salt and pepper to taste

Heat broth and bouillon. Boil onions and celery w/ water until tender.  Mix everything together.  Stick butter pieces throughout the unbaked dish.  Bake at 350°F. for 45 minutes.

2 Comments

Comment

I Need Your Assistance!

In my last post, I wrote about my struggle of gaining weight while cooking and testing recipes over this past summer. When the test subjects include things like fried chicken and biscuits, beyond the initial tasting, I neither want to throw them out nor give them away after I have spent money to buy the things necessary to prepare them.

On more than one occasion I’ve had people say to me “I should hire you to cook for me.” Taking that thought into consideration, I had an idea. Is there anyone in the Nashville area who would be willing to be part of the testing process for my cookbook? I must ask the following questions to anyone interested:

    Can I prepare items of my choosing?

    Can I be reimbursed for monies spent on grocery items?

    Can I be able to share in the meal, either with you or to take with me?

    Can I write/blog about the specific experience (including names,  photographs, etc)?


If you could answer “yes” to these questions, it would be very beneficial to me and my process. 

I’m going to use my blog to initially solicit “candidates” for this. If you have any specific questions, feel free to contact me directly. 

Comment

Chicken Salad

Comment

Chicken Salad

I need to make a confession to you, dear Reader. Since I began testing recipes this past June, I've put on about ten pounds. When the test subjects include fried chicken and biscuits, it's hard to throw them away after a few taste tests! I've got to come to grips with this and make a plan to get some weight off. The being said...

Mama made delicious chicken salad.  It was the kind of thing she made to take to work to share with coworkers. It was also made for any occasion, such as a beach trip, where people want something to snack on. She used the meat grinder for her Kitchen Aid mixer to grind it to a consistency of almost nothing. When mixed, it is much like her Pimento Cheese in that it is a very smooth consistency. 

When I make chicken salad, I use my food processor instead of the meat grinder. I have her mixer and attachments but have never bothered to use the  grinder. I also use it to chop my celery. When boiling the hen, I take the celery tops(leaves) and add to the pot. I like the extra flavor it gives the chicken. To my mixture, I add two to three tablespoons of the broth from the hen. 

I'm currently enjoying some time away from work with a group of my coworkers this weekend. My contribution of Pimento Cheese and Chicken Salad have been well received! Here is Mama's recipe for Chicken Salad: 


1 hen, boiled, cooled and all meat removed

1 quart jar mayonnaise  ( I use half this amount)

1 bunch celery, chopped fine

2 - 8 oz jars sweet pickle relish ( great with homemade sweet pickles) 

lots of black pepper

Run chicken through a meat grinder attachment of a mixer or use food processor to chop very fine. Mix this with all ingredients in bowl of mixer until mixed well, about 5 -7 minutes, varying speed between low and medium.

Comment

Comment

Miss America Pageant - Bacon Crackers

Amanda Kozak, Miss Georgia 2006, after winning her local preliminary Miss Valdosta, September 2005. Amanda later went on to be named 2nd Runner Up to Miss America 2007.

Amanda Kozak, Miss Georgia 2006, after winning her local preliminary Miss Valdosta, September 2005. Amanda later went on to be named 2nd Runner Up to Miss America 2007.

The finals for the Miss America Pageant are being held tonight in Atlantic City, New Jersey. Between 1993 and 2001, I attended the Pageant each year. While still living in Georgia, I served as a volunteer with the Miss America Organization, directing two local pageants, Miss Macon and Miss Valdosta. During that time I travelled and judged local and state pageants in Florida, Georgia, Indiana, Nebraska, New York, Tennessee, Utah, Vermont, Washington, and Wyoming. More importantly, I met some of the brightest, smartest and talented people (contestants and volunteers) and my life is certainly the richer for it. 

In years since being "active" in the pageant world, I still look forward to each September when a new Miss America is crowned. Thanks to social media, there is so much coverage of the week's activities, it's almost as good as being there. 

Bacon Crackers

Bacon Crackers

For my pageant buddies not in Atlantic City tonight, certainly they are now getting ready for pageant watching parties. It's not too late for a quick and easy appetizer. This recipe comes from Martha Hall Foose's A Southerly Course cookboook. 

Bacon Crackers

makes 6 servings

¾ pound (about 16 slices) thinly sliced bacon
42 Rectangular butter crackers (such as Club or Captain’s or Waverly)

Heat the oven to 250°F. Slice the bacon slices into thirds crosswise. Wrap each cracker with a piece of bacon, overlapping as little as possible. Place the wrapped crackers ½ inch apart on a wire rack set over a rimmed baking sheet or broiler pan. Bake 1½ hours or until the bacon constricts the center of each cracker and becomes crisp. Remove pan from the oven and allow the crackers to cool on the rack before eating. 

Comment

1 Comment

Reading, Writing, Arithmetic (strikethrough needed here) Cooking

Pimento Cheese Sandwich Frittata, Take Two

Pimento Cheese Sandwich Frittata, Take Two

First, a quick recipe update. I made my Pimento Cheese Sandwich Frittata yesterday. Instead of using the scraps from cut-out sandwiches, to slices of bread I spread Pimento Cheese on top. It turned out great and Paula gave it rave reviews!

I am thankful to be taking some time off this week from the routine. Between working two jobs, writing blog posts, cooking and testing recipes, preparing for my Cooking Demo and keeping a clean house (well, somewhat clean), I’m glad to be visiting my sister in Florida. She lives in St. Augustine Beach, one of the most beautiful places in the world as far as I’m concerned. I usually visit her two times a year. Upon arrival, my goal is to become bored, which usually doesn’t occur.

So far on my visit, the only productive thing I’ve done is make Pimento Cheese. Let me tell you…it is wonderful on top of a ham sandwich! (thanks to DoubleTake Deals, we got a mini ham from Honey Baked Hams to eat on this week). I may do some more cooking while I’m here. Fresh seafood is something not readily available in Tennessee and I’ve been hankering for some Fried Shrimp. I may also put to use my new “toy”. I purchased one of the GoPro Cameras that I’m planning to use in my home kitchen in the future. But this is starting to sound like work…i’m supposed to be on vacation, right? I have taken a nap each day since I’ve been here and it’s been nice. 

Along with napping, I finished a book I started reading last week. Let me preface this by saying that I am proud that I have read several books this summer. I have always enjoyed reading but it’s something I’ve never really taken time to do. Over my 40+ years, I have, on average, only read about one to two books per year. Do I have Attention Deficit Disorder? Is it easier to sit down in front of a computer and/or smart phone and spend countless hours with nothing to show for it? I can’t really answer these questions, but it has caused me to reflect on books I have read in the past and their impact.

Here is my list of books I’d like to share with you(in no particular order):

The Greatest Miracle in the World - Og Mandino

The Secret History - Donna Tartt

The Color Purple - Alice Walker

The Catcher in the Rye - J D Salinger

To Kill A Mockingbird - Harper Lee

Flowers for Algernon - Daniel Keyes

The Outsiders - S.E. Hinton

The Help - Kathryn Stockett

Jane Eyre - Charlotte Brontë

Anne Frank - The Diary of a Young Girl

Run with the Horseman - Ferrol Sams

My intention is to continue reading well past summer; even after the new Fall television season has begun. You see, as someone who is planning to publish a cookbook, it only makes sense that in order to be a better writer, I need to be more “well-read”. The book I finished was a comprehensive history of Stax Records and yesterday I finished The Leftovers by Tom Perrotta. I bought a copy of Gone With The Wind at a used bookstore yesterday and started reading it. I quickly put it down after about fifteen pages were read. I'm not sure if the fact that it is over 1,000 pages is intimidating me or if the content thus far has not involved Scarlett O'Hara to the degree I would have expected. I decided, for now, to reread The Secret History

1 Comment

Comment

Mama's Pimento Cheese

Growing up, Pimento Cheese was a staple. Family and friends requested Mama make it and serve it at various functions. It was something she often made and took to share with coworkers at Moody Air Force Base. There, many shared that they had no idea Pimento Cheese could be made at home; assuming it could only be bought in a grocery store. 

Mrs. Grissom's Salads were born and raised in Nashville, TN

Mrs. Grissom's Salads were born and raised in Nashville, TN

Mrs. Grissom's Salads originate in Nashville, Tennessee. As you can see in the above listed picture, their product is not even called Pimento Cheese. It is called "Premium Cheese Spread". (Mrs. Grissom's makes other products according to their website but this is what i purchased at my local Kroger). I wanted to try some just to say I had tasted it. While I did like the creamy consistency, to me it does not taste like pimento cheese. The first listed ingredient, salad dressing, gives it a really sweet taste. 

Until last week, the only store-bought pimento cheese I had ever eaten was from a company called Palmetto Cheese. I received it in a gift basket of food products a couple of years ago.  It would be what I would buy in a pinch if I didn't have time to make it myself. Also, Harris Teeter has a "good" pimento cheese in their deli. 

All of this to say in these last two paragraphs, Pimento Cheese is one of the easiest things to make, even for someone who does not consider themselves a cook. 

This batch needs more pimentos!

This batch needs more pimentos!

Mama kept it simple; cheddar cheese (grated by hand), mayonnaise and diced pimentos. When it was easier to find in grocery stores, she used what she called "hoop" cheese, the red-waxed type of cheddar. Her point of difference was to, and I quote her, "beat it to death in a Kitchen Aid mixer". Most every recipe I have ever seen has given directions to mix by hand, which you can do if you do not have a stand mixer. The mixing gives it a very creamy consistency unlike the more textured result mixing by hand. 

When giving my cooking demo last week at the Wilson County Fair, some of the ladies in the audience told me they use Velvetta. I will sound like a snob with this comment but I typically do not use, eat or like anything that is not real cheese. Velveeta is a "cheese product". I think this lady likes the Velveeta because of it's texture. I suggested she try using real cheddar cheese that she lets come to room temperature before grating. 

I have added cream cheese (½ cup and I decrease the amount of mayonnaise), a dash or two of Louisiana Hot Sauce and/or ⅛ teaspoon cayenne pepper.  Sometimes I drain the pimentos and sometimes I do not. I have not added jalapeño peppers and/or bacon, but I plan to do so in the future. I only use Duke's Mayonnaise; NOT salad dressing a.k.a. Miracle Whip. My second choice for mayonnaise is Blue Plate.

Here is Mama's basic recipe:

Mama's Pimento Cheese

1 lb. sharp yellow cheddar cheese (red waxed "hoop" cheese is preferred), grated

2 - 7 ounce jars diced pimento, drained 

1 cup mayonnaise

Set cheese out on counter to soften for 30 minutes to 1 hour. Place grated cheese, pimento and mayonnaise in the mixing bowl of an electric mixer. Set mixer to medium speed and mix until smooth, or as Mama said "beat it to death"; approximately 5 minutes. Pause mixer to scrape sides as necessary. Chill 2 hours or overnight before serving. It will spread easier for sandwiches if allowed to sit on counter for up to 30 minutes. May be stored for up to one week. 

Makes approximately 4 cups. 


Comment

Comment

Pimento Cheese Mini-Muffins

At my cooking demo on Saturday at the Wilson County Fair, my presentation was Pimento Cheese. While engaging the audience, I discussed different uses for Pimento Cheese. I mentioned this recipe and promised to post here.

For a Martha White recipe contest. I conceived this recipe and it’s ingredients.  As I worked on different variations, I would take the results in to work to share with coworkers.  While I got rave reviews there, the folks at Martha White never called ! I would suggest this be served at a luncheon type of event.  

I typically do not eat or will not use a cheese "product". However, this cheese product helps to give a cheddar flavor to the muffins that I don't think could be achieved unless a cheese sauce is made from scratch. This cheese spread helps to make this a simple recipe to make.

1 Martha White Buttermilk Cornbread & Muffin Mix (6 ounces)

1-8 ounce container Extra Sharp spreadable cheese product (found in cheese or deli section of your supermarket. If you can’t locate this, use 1-5 ounce package. Kraft Old English Sharp Pasteurized Process cheese Spread)

1 cup milk

1 cup extra sharp cheddar cheese, grated

1 teaspoon dry mustard

1 teaspoon Worcestershire Sauce

½ teaspoon cayenne pepper or to taste

1 teaspoon white pepper (optional)

Dash of hot sauce

1-4 ounce. Jar diced Pimentos, drained

Preheat oven to 450°F.  In a saucepan, on low heat, combine milk, spreadable cheese, shredded cheese, dry mustard, Worcestershire sauce, spices and hot sauce.  Whisk until smooth and blended.  Take off heat to cool slightly.  Combine with muffin mix and pimentos.  Pour into mini-muffin tin that has been prepared with cooking spray.  Bake for approximately 13-15 minutes.


Comment

1 Comment

Rock & Roll...well, not really

If I were a musician, a.k.a. a “rock & roll” star, last night would have been considered my first gig. 

Quasi-Celebrity status at the Wilson County Fair

I arrived at the Wilson County Fair Saturday afternoon around 1pm. I had been advised by Shelly Barnes, who was my point of contact for the event, to do so as it was the last day of the Fair. Large crowds were expected and she did not want me to sit waiting to enter and park. Upon arrival, I was greeted by one of the Fair volunteers on a golf cart. She transported me and my items to the exhibit building. I felt like a VIP and was thankful for her timely arrival. Otherwise I would have been making three trips back and forth from my vehicle to collect everything.

They really take care of VIP's at the Wilson County Fair!

It was too hot to walk around too much yesterday afternoon, but I did get out a couple of times and walk through some of the exhibitions. Otherwise I was able to stay cool and hydrated. Around 5:00 pm, my “entourage” arrived. I enlisted the video and photography services of my neighbor, Andy Tomlinson. He has done several video projects in the past and I asked him to preserve and record my demonstration so that family members not able to attend could see it. Andy brought Chance Edwards to assist in videography and Dianna Griffey shot over 100 still images. They were able to get unloaded before a rainstorm hit the fairgrounds. 

Before/During...

Before/During...

From there, it was T-minus 90 minutes before showtime. My demo would consist of preparing Pimento Cheese as well as my Sweet PC Delight dessert. I prepared 2 desserts the night before and portioned them into 2 ounce cups. I prepared 2 loaves of bread-worth of pimento cheese sandwiches Friday evening. My presentation skills in the kitchen are something I will always struggle with. The decision was made to use a round cookie cutter and cut-out samples of the sandwiches like ones served as an appetizer. The 2 loaves worth of sandwiches yielded over 100 rounds! The scraps left over from the rounds were mainly crusted sides, many of which still had a good amount of pimento cheese. I did not throw those away and I’ll reveal at the end of the post what I did with them.

When it came time for the demo to begin, luckily most all of the 40 chairs were filled. As I mentally prepared for what I would present, I decided to make it as conversational as possible. In my day job, I am a facilitator and trainer. I just channeled those previous experiences with a different topic. I asked questions of the audience during my presentation and was able to connect with them. 

I spoke of my cookbook project and how mine will be different. It did not take long to prepare my dishes (i purposely chose recipes that did not require many steps for my first demo) and was able to serve my samples and yield questions from the audience. As door prizes for my audience, I gave 5 bags of grits direct from my hometown of Lakeland, Georgia. I asked questions to see if my audience had paid attention to my presentation and 5 lucky folks took home Gayla’s Grits. 

I will post more photos and video of my demo in the next few weeks. I will also share my pimento cheese recipe as well as the recipe for my Sweet PC Delight. However, today I want to post the recipe that I created out of my scraps leftover from the sandwiches last night. It is much like what you would find in something called an Overnight Sausage Casserole.

This was so yummy!!!

This was so yummy!!!

Pimento Cheese Sandwich Frittata

This recipe was tested using scraps from Pimento Cheese sandwiches that were cut into rounds using a round cookie cutter. If you don’t have an occasion to make party sandwiches, i would experiment using whole sandwiches, approximately six, or take six slices of bread and spread pimento cheese on top. 

Take a 2 quart casserole dish and spray with non-stick cooking spray. Fill the bottom of your casserole with the sandwich scraps, enough to cover the bottom of the dish and not overlapping. Set aside. 

1 - 8 ounce package diced ham

6 eggs

2 cups half and half

1 teaspoon dry mustard

8 ounces extra sharp cheddar cheese, grated

Sprinkle diced ham on top of sandwich scraps. In a bowl, whisk eggs until well beaten. Add half and half and dry mustard and mix to combine. Pour mixture over previously layered ingredients, making sure to saturate completely the entire surface. Sprinkle with salt and pepper over top; cover and refrigerate for 8 hours or overnight. 

In the morning, pull casserole from refrigerator and let sit 30 minutes before baking. Preheat oven to 350ºF. Top casserole with grated cheese and bake for 45 minutes. Allow to rest 30 minutes before serving. 


1 Comment

Comment

Let's Go To The Fair!

It’s Fair time in Tennessee. Many counties in the vicinity of Nashville are holding their annual Fairs over the next several weeks. In Nashville, we host the Tennessee State Fair which is held the second week of September. However, “the” fair in our area is the Wilson County Fair in Lebanon. Last year Wilson County had attendance of over 500,000. The 2014 Fair opened two days ago and will end on Saturday, August 23.  

On closing night, I will be participating in the “Taste of Wilson County Cooking Demonstrations”. Shelly Barnes is the FCS Agent with the University of Tennessee Extension Office in Wilson County and she invited me several months ago to participate. I met Shelly several years ago at the Fair and she has been a great resource for me in preparing to write my cookbook. 

I want to personally invite you and also give you some details and other information.

The demo starts at 7pm and ends at 8 pm. It will be in the Adult Exhibits building D. When you enter the fairground you can obtain a map and program of daily events. My event is listed in the program as “Taste of Wilson County Cooking Demonstrations”

Saturday August 23  - WIlson County Fair

James E. Ward Agricultural Center

945 Baddour Parkway

Lebanon, TN 

www.wilsoncountyfair.net

Admission to the fairgrounds is $7.00 for adults; $5.00 for children; children 2 and under are free. 

You are welcome to use your favorite maps application for directions, but if you are traveling from Nashville and prefer a scenic route with minimal traffic (there is usually a LOT of traffic getting on and off Interstate 40 at the exit for the fairgrounds), I have these directions that are from my friend Keith Leedham who lives in Wilson County. I attended the Fair last night and used these directions:

From Nashville; 

Take I-40 East toward Knoxville

Take exit Exit 232-a (TN-109 south)

TN-109 turns into Central Pike (TN-265 east) You will cross over TN-840 and the road will wind, twist and turn for several miles. Turn left on TN-231 North. It will cross I-40 and you will pass many businesses and restaurants. Turn right on Tennessee Blvd; then after one mile turn right on Baddour Parkway. You will see entrance to the fairground to the left.

If you are planning to attend, you might want to come earlier in the afternoon. I arrived about 4pm and while there was traffic backed up at the entry gate, there was a great amount of traffic trying to enter the fairgrounds when we departed around 8:30 pm. 

I would love for you to attend if you can. Please reach out to me if you have any questions.

Comment

Comment

Spaghetti & Meat Sauce

A couple of weeks ago I received a gift of homegrown tomatoes. Between a Tomato Pie and Tomato Sandwiches, my yield was used toward making a homemade meat sauce for spaghetti. Mama was the only one in our home who really loved it. Daddy, Paula or myself usually turned our noses up at it. The thing I remember not liking about it was that she mixed the noodles and the sauce together before it was served. When I had the opportunity away from home, I would eat it served with the sauce spooned over the top. I guess I wanted to choose to mix it myself. 


Working on this cookbook and thinking of memories and food I was served growing up, spaghetti came to mind. I did not have Mama's recipe for it, but I remember her using tomato paste, canned tomatoes, onions, green peppers and hamburger meat. In conversation with Lalah Williams a few weeks prior, she told me of a book written by Sadie Le Sueur called Recipes, Party Plans and Garnishes, published in 1958. Sadie was a pillar of Nashville's Centennial Club and the book centers around menus and recipes for different types of occasions. 

I have made this on two occasions; the first was two weeks ago with fresh tomatoes. I used the same amount in weight of fresh tomatoes as recommended for canned. Over the last two days I completed this sauce using canned tomatoes. This time I added a half-pound of breakfast sausge to the beef as I was cooking it. I also put the sauce in my slow cooker and cooked it on low for 8 hours.

Spaghetti & Meat Sauce


1 pound package spaghetti

1 pound ground beef

1 tablespoon olive oil

1 large can tomatoes, 2 1/2 size (27 to 29 ounces); use any kind, I used crushed

1 6 oz. can tomato paste

2 large onions, chopped fine

2 bell peppers, chopped

1 tablespoon olive oil

1 tablespoon Worcestershire sauce

1 tablespoon horseradish

6 ounces Parmesan cheese, grated

1 clove garlic, minced

1 bay leaf

1 teaspoon sugar

Sauté onions, celery and peppers in 1 tablespoon of oilve oil until tender; 5 to 7 minutes. Add tomatoes, tomato paste and bring to a slow simmer. In a separate skillet, brown ground beef in 1 tablespoon olive oil; do not drain. Add beef mixture to tomato sauce; add Worcestershire sauce, horseradish, minced garlic, bay leaf and sugar. Simmer, covered, for 2 1/2 hours or cook on low in slow cooker for 8 hours. Cook noodles according to package directions; drain. Add drained noodles to meat sauce; mix well and allow to sit on stove top, covered for 30 minutes before serving. Serve with grated Parmesan cheese. 

Comment

1 Comment

Squash Casserole

Squash Casserole

Squash Casserole

Last week’s bounty of homegrown tomatoes are still taking me into next week. The Tomato Pie was devoured in one day. The spaghetti has two remaining portions for this week’s lunch. The last two tomatoes that didn’t go into the pie or pasta were eaten in tomato sandwiches late last week. Smothered in Duke’s Mayonnaise, salt and pepper and placed between fresh white bread, my only regret was that I did not peel the tomatoes first. Oh, well…who out there has more homegrowns for me?

I have been continuing to test Fried Chicken and Biscuits. The progress on these will soon result in published recipes here on the blog. Tonight my friend David Paine will join me for chicken, biscuits, gravy and Grandma Pafford’s Squash Casserole. I also made a batch of Peanut Butter Cornflake Cookies this morning; substituting Rice Krispies for the cornflakes. This morning I experimented with putting the plastic jar of peanut butter in the microwave for approximately one minute on high. I don’t like the idea of wasting anything and I figured since the peanut butter would be heated on the stove, why not heat it in effort to scrape as much as possible from the jar. Doing this seemed to speed up the process for making this substantially. 

I’ve had many squash casseroles in my day and I can’t recall a specific way Mama would have made it. I was able to secure some small yellow squash this afternoon at Madison’s Farmers Market at the Amqui Station. I had hoped for some small ones and luckily a farm from Gallatin was on hand to supply. I had the casserole in the oven for 10 minutes before I realized I had forgotten to mix in the pimento. I quickly pulled it from the oven and scattered it on the top and returned it back inside. I think it came out fine. 

Here is what I prepared, based on Grandma Pafford’s Squash Casserole recipe: 


Squash Casserole


2 lbs. yellow squash, sliced

1 small onion, sliced

¼ cup water

4 oz. sliced pimento, drained

1 egg, beaten

½ cup milk

1 cup cheddar cheese, grated

2 tablespoons butter, cut into pieces

1 teaspoon salt

2 tablespoons sugar

Preheat oven to 350ºF. In a covered pot, cook squash and onion in ¼ cup water until tender; 5 to 7 minutes or until done, stirring occasionally. In a large mixing bowl, mix squash/onion mixture with pimento, egg, milk, cheese, butter, salt and sugar until well combined. Pour in a 2 quart casserole dish that has been greased or sprayed with non-stick cooking spray and bake for 25 minutes. 

1 Comment